So its time to talk about building again. As if we are every really NOT building or tweaking something on the truck. While in Guatemala we decided to tackle the challenge of adding more solar panels to the truck. I can’t really remember exactly how we came to that decision, but it quickly went from “wouldn’t it be awesome if…” to “We need to hustle to get the panels ordered NOW…”
The Challenge
Our existing system consisted of two 270 Watt solar panels mounted flat on the roof and two folding 64 watt panels stored inside until needed. This gave us a total of 668 Watts of potential power. At our charging voltage of 14.1 that equates to 47 amps of charging current. But this is all theoretical, with the panels mounted flat on the roof vs tilted, and the folding panels rarely ever deployed. We harvested significantly less. We still routinely captured 200ah of energy a day, but we often used 150 – 300ah a day depending if we were in full production mode, charging lights and cameras. We decided we wanted to expand our system, the question was how.
This roof was already pretty full!
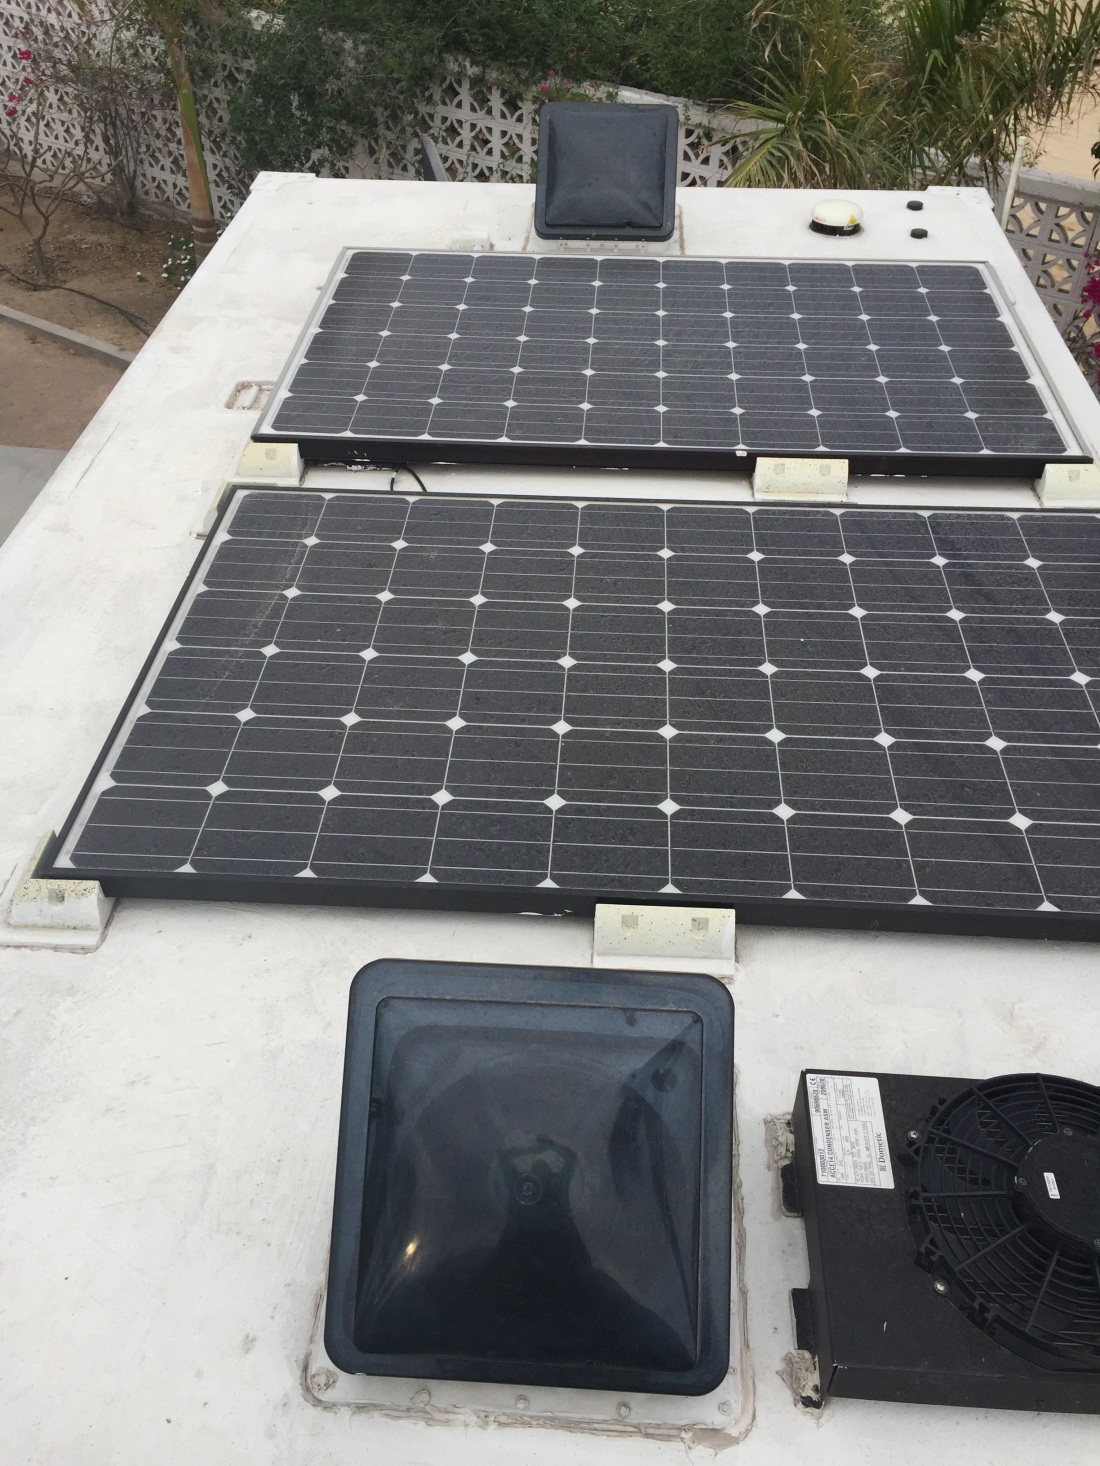
Fans, AC Condensers, Satelitte Antenna, and other items already filled our roof almost edge to edge. We simply didn’t have significant free space to add additional panels to the roof. We could may be fit an addition 50W panel in a corner and that wasn’t worth the effort.
The Solution
We decided a better approach would be retractable solar panels. If we could stack one panel above the other, then we could double the amount of solar power for the same space. So we could take our system up to 1kw of power! This sound very simple in theory, but turned out to be tricky in practice.
We found the guys at Aeterna Solar in Antigua, Guatemala and they were invaluable in sourcing our solar panels as well as helping to dream up a solution to create sliding solar panel mounts. Unfortunately their lead installer was busy on another job for the week we were going to do our install, but they still managed to deliver the panels and some mounting hardware to the campsite where we were staying. Overall they delivered great service. They weren’t the cheapest, and we could have saved by going direct to the distributer in Guatemala City, but overall to get everything dropped off to us, and some brainstorming support, it was worth it.
We purchased another 400 Watts of panels (4 x 100Watt Panels) and the plan was to stack the large existing panels one over the other, and then have two stacks of smaller panels, where the old larger panel uses to be. We wanted to leave a gap at the rear of the box between the two smaller stacks to place a RV airconditoner there in the future (more on that later) So in total 3 stacks of solar panels on the roof, for a total of 970 wars on the roof and 128 watts inside.
The initial plan was to make our own slide mechanisms using random parts that Kyle purchased in Guatemala City.

After getting everything back in front of us, we quickly jettisoned that idea. It simply wasn’t going to be reliable, and we couldn’t find a fabricator who could take on the challenge. This left us looking for an industrial solution. We decided to try and source industrial drawer slides to slide the panels out. This proved pretty hard in Guatemala to find what we needed. Luckily I had to go back to the USA for a paying gig, and ordered everything there, and brought it back to Guatemala. I used a speargun bag to bring the 60 inch long slides back. Oh don’t mind this bag customs, its just fishing equipment.
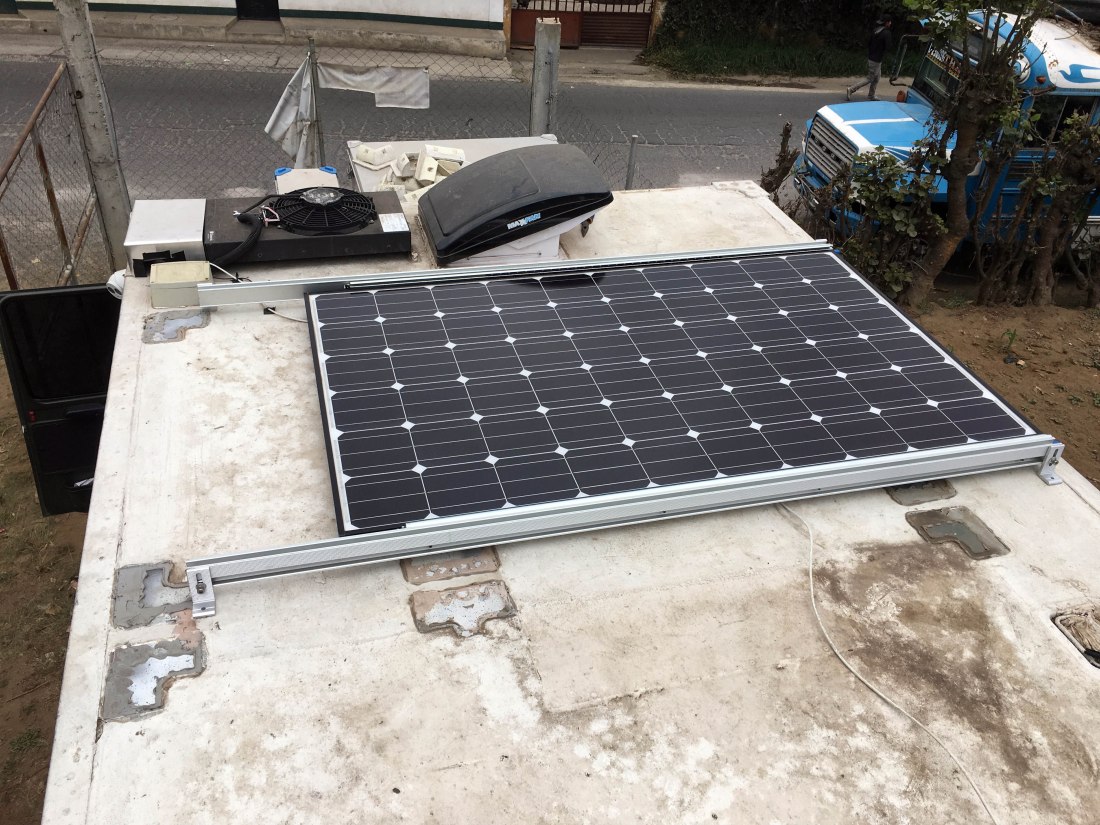
First order of business was to remove the old mounts. They were plastic mounts sealed to the roof with sikaflex. We had to physically cut the mounts away from the roof to get them up. I have to say I am impressed with the holding power of Sikaflex.


With the mounts removed we had to carefully lower the panels down off the roof. This was a bit precarious as the panels are about 40 inches by 65 inches, and the roof of the box is 11ft off the ground.

To create the frame to mount the rails, we used aluminum extrusions that Kyle sourced for us, and some very niftly mounting pieces that they use in large scale solar jobs. These worked perfectly to created the frame. The idea was that the panel on the bottom would slide out, so that there would be no shading on either panel. If the top panel slid out, the frame that the rails attach to, could shade the bottom panel some. We are really trying to maximize the yield for the cost and effort. We tackled the big panels first as they presented the most challenge in handling. I have to say that everything went together fairly easily. The hardest part was mounting the rails, as a 60 inch slide, fully extended, becomes quite unwieldly. With the lower panel mounted to the slides and the frame, we mounted it to the roof. As it slide out for the first time, it was magical!

Mounting the panel on top presented little challenge. We were able to repurpose some additional hardware from the solar mounting kit Kyle provided, while we had some pieces of aluminum cut by a local window maker.
The little stacks were easy with the knowledge we gained from the big panels. They went together in record time.

To tie all of the wiring together on the roof, we purchased a prewired and breakered combiner box from the guys at Imagine Instruments. Its pretty nifty because the combiner box comes wired with MC4 connectors to make connections a breeze to the strings, and also includes all of the breakers for the strings as well.


This was a huge time saver, and their workmanship is impressive. There are other “RV” combiner boxes on the market, but they cost $80 and they are barely more than a couple bus bars in a plastic container. This is a great value for the money and I am surprised it was so hard to find these guys.
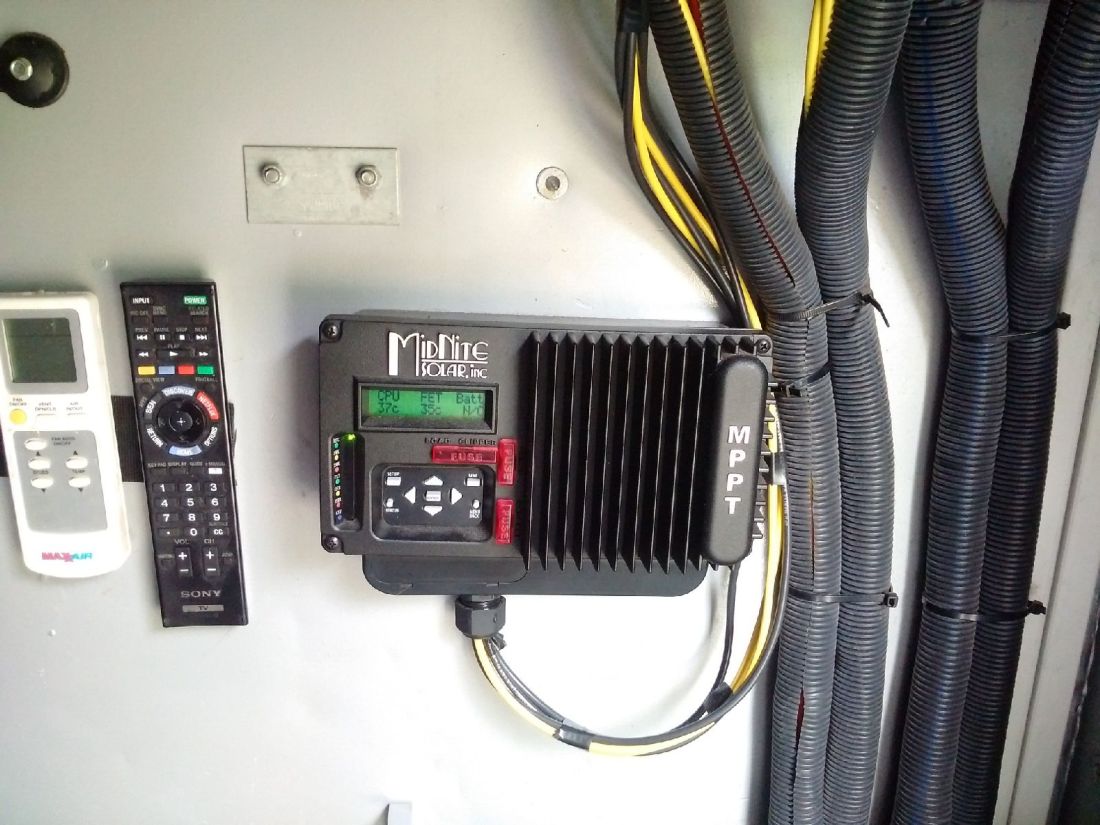
We added a Midnite Solar Kid charge controller to control the new panels. Forgive the picture, the wires will be properly dressed soon. The Kid is a 30 AMP MPPT charge controller, and packs a ton of advanced functions. The most important for us is a programmable charging profile, so we can best match it with our lithium batteries. We considered the new Morningstar ProStar MPPT Controller, but the Midnite Solar was a bit cheaper and we wanted to try another brand to be different. But Morningstar is still our general solar recommendation as we have the most experience with their kit. Time will tell.
The Result
The system is performing GREAT and to spec. When we slide out the addtional panels the output doubles. We now have a total of 940 Watts when all panels are open, and 440 when the panels are closed. The theoretical max at 14.1 volts is 69 amps with all of the panels extended.The best we have send thus far is about 60 amps of combined output. We are pretty happy with that! This has made a huge difference for us in our ability to boondock and to keep the batteries charged, while running all of our electrical items.
Fully Closed

With the panels closed we gained about 2 inches of height. and we dont have any additional overhang from the panels. We also strategically left space in between the rear panels for a new roof mounted air conditioner.
Fully Extended

With the panels out, we have some nice additional shade on the box :). The large industrial slide on the big 274 Watt panel is a beast, but super smooth.
We still have some loose odds and ends to wrap up with the install. Right now, opening and closing the panels is something that has to happen from the roof. We are working on a mod to allow us to do this from the ground. Also, we have an overbuilt system in place to lock the panels closed. We want to simplify this a bit, to make it quicker to open and close. Eventually the slides will need to be cleaned and greased, but after the first couple months, they have been working great.
Overall we are happy with the mod and wish we had done it from the beginning! It would have been a lot cheaper and faster to do this job in the USA, but alas this is part of living on the road.

Amazing job. Especially considering its Guatemala.
>
LikeLike
Thanks man!
LikeLike